If you enjoy what you find here, be sure to subscribe or become a follower so you can stay up to date with all my bloggy goodness.
Showing posts with label recipe. Show all posts

Friday, February 10, 2012

cheesy vegetable soup

It was a clean out your fridge kind of day.  Remarkably, this soup tastes a lot like what we had at the Dixie Stampede a few years ago.  Delish!

1 tbsp olive oil
piece of an onion, diced
Saute in the bottom of a stock pot

Add:
8 cups of water
4 beef bouillon cubes
salt
pepper
celery salt
garlic powder
parsley
1 pint canned cabbage (if you use fresh, just boil longer)
1/2 can of carrots
Bring to a boil.  Let cook about 5 minutes.  Scoop out chunks of cabbage and carrot and puree, then add back to pot.

Add 2 quarts of canned diced potatoes or about 8 diced raw potatoes.  Simmer until potatoes can be broken up with a potato masher.

Add Velveeta to taste.  Melt. 

Add milk or heavy cream and cornstarch to thicken.  Serve with bread.

Tuesday, May 31, 2011

dark chocolate preacher cookies

This recipe is loosely adapted from a church cookbook that I found at my mother in law's home over the weekend.  While we were visiting, most of the family was outside building a massive wooden swing set/ fort thingy.  However, I was stuck inside during Katie's naptime and grew bored quickly.  What else was there to do, but to bake?

source

Ingredients:
2 cups sugar
3 heaping tablespoons dark cocoa powder
1 stick of butter
3 cups quick oats
1/2 cup peanut butter


How To:
Mix together the sugar, cocoa powder, and the butter in a heavy saucepan.  Bring to a boil and stir constantly for three minutes.  Remove from heat.  Add oats and peanut butter.  Mix well.  Scoop heaping spoonfuls onto wax paper and let cool.  Ready to eat in about ten minutes.

These cookies are good all by themselves, but are absolutely delicious with a glass of milk. 

Sunday, May 8, 2011

berry whip trifle

This weekend, my family and I took to the hills to go strawberry picking.  We drove through the woods, over Beaver Dam Creek, and out a winding road to Scott's Strawberry Farm, located in Moneta, VA.  The berries were ripe for pickin' and we had a wonderfully relaxing morning in the field.


Upon returning home, we all sat down at the kitchen table and capped the strawberries.  As we capped them, Katie shoveled the juicy fruit into her mouth as fast as she could.  By the end of the afternoon, she was covered in strawberry juice from her hairline to her belly-button.  


For the first time ever, I made strawberry freezer jam, using the directions in a box of sure-jell.  I would love to post pictures, but thrift got the best of me and I "canned" my freezer jam in gladware instead of the cute little Ball jelly jars.  If anyone wants to send me an i-love-you present, then a couple of sets of jars would be greatly appreciated.  

Last night, I also baked an angel food cake in preparation for my Mother's Day trifle.  Oh my wow... it was so delicious!  I first ate angel food cake as a preteen.  The cake was purchased from the nearby convenience store that everyone would hang around after school hours.  It was prepackaged, airy deliciousness.  I had never tasted it before and I longed for it many times thereafter.  

While angel food cake was widely available at the grocer, my mother would never purchase it.  She preferred those little spongy rounds that are sold near the strawberries every spring.  Shortcake in our home was nowhere near homemade.  

One year, she did try to make actual shortcakes using Bisquick, but it didn't turn out well and everyone refused to eat them.  I swear, one of those little cakes could have broken a window, had it been tossed in the right direction!  

Personally, I prefer the combination of angel food cake, sugar-coated strawberries, and redi-whip.  But, canned whipped cream wouldn't hold up to setting as a trifle, so I went the cool-whip route instead.  My trifle consists merely of cubed angel food cake, strawberries, and cool whip.  I left out the jello, pudding, cream cheese, and other concoctions that I found online because, to me, they weren't very classic.  The result was absolutely delicious.  


If you slow down and use room temperature whip, your version will look much nicer.  But, I was in a rush and I licked my fingers a lot.

Berry Whip Trifle
4 cups strawberries, capped and halved
1 angel food cake (see recipe below)
1 container cool-whip

Layer ingredients as desired, starting with the cake and ending with the cool whip.  Add whole decorative strawberries on top.  Refrigerate overnight.  Serve cold.

Angel Food Cake

12 eggs
1 1/4 cup confectioner's sugar
1 cup cake flour
1 1/2 teaspoons cream of tartar
2 teaspoons vanilla extract
1/4 teaspoon salt
1 cup sugar

  1. While eggs are cold, separate them.  Discard yolks or refrigerate for another use (not sure what.  I tried to make a yolk-heavy ham and cheese omelet for breakfast this morning and it was inedible.  Well, the kids ate it... but anyone with particularly developed taste buds would not have.  I promise you.)   Place the egg whites in a mixing bowl and let them stand at room temperature for about an hour, or until you remember you were going to bake a cake.
  2. Meanwhile, mix together confectioner's sugar and flour together.  You could sift them if you're really special, but I just flopped a fork around in the bowl a few times and it was fine.  Maybe it could have been better, but honestly-- I don't see how.  
  3. Add cream of tartar, extracts and salt to egg whites; beat a minute or so on high speed.  If you have a stand mixer, turn that baby all the way up and just let it fly.  Don't let it fly too high, though, or you won't have room for the sugar.   (It is best to use the flat whisk-y attachment, not the balloon whisk for this) Gradually add sugar, beating hard until sugar is dissolved and stiff peaks form.  Again, don't get distracted.  
  4. Fold in flour mixture, 1/4 cup at a time. 
  5. Gently spoon into an ungreased 10-in. tube pan. Cut through batter with a knife to remove air pockets. Bake at 350 degrees F for 40-45 minutes or until cake springs back when lightly touched.  
  6. Flip cake out of pan while still warm.  You may need to run a knife around the sides to loosen it, too.
You know what just occurred to me?  I bet it would be so yummy to serve this with that freezer jam on top.  Oooo-weee! Yum!

Monday, April 18, 2011

empty tomb cookies

Though we are on "spring break" this week, my children and I are going to spend some time talking about what Easter is really about.  I was looking for fun activities that we could do to illustrate the Easter Story when I came across a recipe for Empty Tomb Cookies.

One Palm Sunday several years ago, I made something similar to this with my Sunday School class.  Instead of cookies, we baked Resurrection Rolls.  The lesson went well.  The children enjoyed being in the kitchen and were very attentive.  While the rolls were baking, we made construction paper palm fronds to carry with us into the sanctuary for worship.

However, in stumbling across this recipe for cookies, I think I have found an even more meaningful activity to do with my own children.  The author outlines activities throughout the lesson that will serve to provide a hands-on understanding of the Easter Story.  Additionally, for each step in the baking process, she provides Scripture to read and discuss.  She completes her tutorial with lovely photographs of her children and her cookies (which look delicious, by the way).

I think my favorite part of the entire recipe is when the children tape the oven closed the night before Easter and allow the cookies to bake overnight.  This gives them something more substantial to be excited over on Easter morning, rather than just what the Easter bunny may have brought.  While our family does the whole Easter bunny ~ basketful of candy ~ hidden egg thing, I really want to work to impart more meaning in the treasured holiday.  This may be our perfect way.

Easter morning, 2010

Sunday, February 27, 2011

the little sandwich cookie which could

... cause me to gain ten pounds overnight.

At least, that's my best guesstimate.  Because I ate not one, but two of these heavenly wonders.   After dinner tonight, I wanted a little something sweet.  Okay, I really wanted a warm, chewy, fresh-baked chocolate chip cookie.  But, horror!  We were out of chocolate chips.  Not just almost out, but completely out.  I'll have to add that to my Sam's Club list for this week.  That, and another 10 lbs of flour and some cocoa.  Because I've been doing THAT much baking recently.  Yeah.  Ten pounds right on my ass.

Anyway, we were out of chocolate chips, but we had half a container of Hershey's cocoa powder and a bag of confectioner's sugar.  Then, I remembered this recipe that a friend had shared a while back.  I just had to go there.  Now I have a whole tray of cookies waiting to be iced.  Am I complaining?  Heck no.


Here's the recipe, but you really need to hop on over to smitten kitchen to read the author's funny little tales that go along with each recipe.  She really is my favorite internet cook.

Makes 25 to 30 sandwich cookies

For the chocolate wafers:
1 1/4 cups all-purpose flour
1/2 cup unsweetened Dutch process cocoa
1 teaspoon baking soda
1/4 teaspoon baking powder
1/4 teaspoon salt
1 to 1 1/2 cups sugar [see recipe note]
1/2 cup plus 2 tablespoons (1 1/4 sticks) room-temperature, unsalted butter
1 large egg
For the filling:
1/4 cup (1/2 stick) room-temperature, unsalted butter
1/4 cup vegetable shortening
2 cups sifted confectioners’ sugar
2 teaspoons vanilla extract
  1. Set two racks in the middle of the oven. Preheat to 375°F.
  2. In a food processor, or bowl of an electric mixer, thoroughly mix the flour, cocoa, baking soda and powder, salt, and sugar. While pulsing, or on low speed, add the butter, and then the egg. Continue processing or mixing until dough comes together in a mass.
  3. Take rounded teaspoons of batter and place on a parchment paper-lined baking sheet approximately two inches apart. With moistened hands, slightly flatten the dough. Bake for 9 minutes, rotating once for even baking. Set baking sheets on a rack to cool.
  4. To make the cream, place butter and shortening in a mixing bowl, and at low speed, gradually beat in the sugar and vanilla. Turn the mixer on high and beat for 2 to 3 minutes until filling is light and fluffy.
  5. To assemble the cookies, in a pastry bag with a 1/2 inch, round tip, pipe teaspoon-size blobs of cream into the center of one cookie. Place another cookie, equal in size to the first, on top of the cream. Lightly press, to work the filling evenly to the outsides of the cookie. Continue this process until all the cookies have been sandwiched with cream. Dunk generously in a large glass of milk.
    Finally, I just want to share that I'm honored to have been chosen (at random, fine, but still...) to be this week's Featured Blogger at Mom Blog Monday Blog Hop (that's a mouthful!).  Please link up below, if you so wish, and be sure to follow the first three (plus me!) blogs on the list. 

    Thursday, February 24, 2011

    mixed berry blast fruit roll ups

    Last summer, I bought a couple of bags of mixed berries with the intent of scooping them out for pancake toppings, berry muffin mixes, and smoothies.  I did make one batch of muffins, which were gag-worthy, before the bags got pushed to the back of the freezer.  I dug them out this week and decided to make some homemade fruit roll ups, or fruit leather.


    I have not purchased fruit roll ups for my kids for years, mainly because my son can't have them due to dental issues.  However, I can tell you that I will never buy them again.  This recipe is so easy to make, and pretty hard to mess up.  Substitute other types of fruit for the berries, if you prefer.  This would be great with strawberries, apples, grapes, kiwi, or pears, for instance.

    Just for kicks, I looked up the ingredients for General Mills Fruit Roll Ups.   According to their website, you're looking at "pears from concentrate (so, okay... you're getting pears... but this list is supposed to be for the berry flavored roll ups), corn syrup (no big surprise), dried corn syrup, sugar, partially hydrogenated cotton seed oil, and 2% or less of the following: citric acid, sodium nitrate, acetylated monoglycerides, fruit pectin, dextrose, malic acid, vitamin C (absorbic acid), natural flavor, color (red 40, yellows 5 & 6, and blue 1).  Wow.  That's a lot of stuff.  If I wanted to make that at home, I don't even know where I would by some of that stuff.  acetylated mono-whats?  hmmm.

    The good thing is, home cooks can make something even tastier with fewer ingredients.  I don't know that these homemade fruit roll ups cost less, or the same, as the packaged version, but you do get more than ten at a time, so I'm willing to bet that the price evens out.  As for the taste, my kids loved them.  My son even asked for more.  That's something that rarely happens, even with fruit.

    he was happy to be eating it.  he only looks puny because of a cold.


    Ingredients:
    4 cups fresh or frozen berries
    Sugar to taste (I wound up using about a half a cup)
    1/2 cup water
    splash of lemon juice, to taste

    Also, you'll need parchment paper, saran wrap, a blender, a couple of cookie sheets or rectangular cake or brownie pans, and an oven (or a hot hot hot day)


    Cook berries, water, and sugar and lemon juice on medium low heat for about 20 minutes, though you could half this time if you are using fresh or thawed fruit.

    Puree fruit mixture in a blender until smooth.

    Line cookie sheets with parchment paper, allowing some extra to hang over one edge.  Make sure to only use one piece of paper per cookie sheet.  If you piece it together and have a seam, the fruit will run underneath and won't solidify.  Trust me on this one!  (I used saran wrap for this step, but I later worried about heating the plastic in the oven.  So, you may see saran wrap in the pictures, but I don't recommend using it).

     Pour puree into cookie sheets, 1/8 inch to 1/4 inch thick.  Bake in an oven, preheated to 150 degrees for 8 to 12 hours.  Or, leave the trays outside in the heat all day.

    Roll-ups are done when they are firm to the touch.  Let cool to touch, remove fruit from paper.  Place fruit sheet on a sheet of saran wrap, roll fruit and wrap together tightly, like you're rolling up a newspaper, and cut into sections.  Store in an air tight container up to a month.

     Yield varies, but this made two cookie sheets' worth for me.


    Smart and Trendy Moms

    Monday, February 21, 2011

    pass the cat puke, please (a recipe for gruel)

    If you enjoy what you find here, be sure to subscribe or become a follower, so you can keep up with all my bloggy goodness.

    Don't you just hate it when you come down with a cold so nasty that you want to just lay in bed for days on end? Your head is throbbing, your nose is flowing, and you're hacking up random green monsters. The last thing you want to do is cook dinner, right?

    On Friday evening, after retiring to bed around 1 PM, I actually gathered up the strength to throw together a meal for my family. Admirable, huh? A few weeks prior, I had made a version of Beef Stroganoff that my friend Hampton had shared with me. According to my recollection, it was a fairly simple recipe to make, and the whole family apparently enjoyed it.

    Now, I don't know if I remembered the recipe incorrectly, or if it was the substitution for ground turkey instead of ground beef, or if it was the cooking time, or what.  I don't really know where I went wrong.  But, when the meal was finished, the product closely resembled cat puke.  Yes, really.  It was a gray, chunky mess.  Not quite runny, but definitely moist.  The best part was that I served it up over egg noodles, which make everything better.  So, we had cat puke on noodles.  Yum-o.

    The worst part of the meal was that I felt so poor I didn't even notice.  My husband didn't say much about this dish, other than making an interesting little squeak when I told him, in a proud sort-of way, that I had added A-1 this time.  A-1!  That makes everything taste delicious!  Except, maybe, things resembling cat vomit.  But, I still didn't get it.  I put lots of salt and pepper on my meal, after remembering that I had forgotten to season, and ate it up.  My daughter poked at hers.  My husband looked a little green.  But, it was good.  I had fixed a lovely meal, despite the rivers of neon slime running from my nose.

    The next morning, I got up after a pretty decent night's sleep.  What did I find on the stove?  Definitely not the gourmet home meal that I envisioned myself preparing in the midst of illness.    Nope, I found a frying pan full of cat puke, and we don't have a cat.  You know how most things, if left out overnight, will get crusty and stick to the pan?  Not this.  Though the top looked funky and a little dried out, the bottom was just as moist as the day it was hacked up.  All I had to do was tilt the pan over the trashcan and, plop!  Out it slid, leaving a gooey, gray trail in its path.  That's when I first realized that the lovely meal I created looked more like something the cat coughed up on her deathbed.  Slimy, chunky, gray vomit.  Oh, the memories.

    Later in the day, I apologized to John for feeding him the mess.  "That's okay," he said.  "It was more like gruel."  Gruel!  Oh dear.  Gruel.  Well, that's only slightly less flattering than cake puke.  Gruel is the food of old ladies and ogres.  Maybe a prisoner or two.  My poor family.  I fed them gruel. 

    Wouldn't you know, at 4:30 that afternoon, John was kindly in the kitchen preparing dinner.  I guess he didn't want to chance it.  We ate macaroni and cheese and corn dogs that night.  After the previous evening's meal, it felt like we were in a five-star restaurant in the city.  Nitrates on a stick... yummy.

    Gruel
    Ingredients:
    One can of cream of mushroom soup
    2/3 pound of ground turkey
    A shot of A-1 sauce

    Directions:
    Brown ground turkey.  Add canned soup and A-1, stir.  Cook over low heat until you get bored.  Serve over cooked egg noodles.  Pinch nose while eating.

    **This is not the recipe that Hampton shared with me.  It is, however, my sickie-recollection of it.

    Wednesday, February 16, 2011

    cherry cheesecake

    If you enjoy what you find here, be sure to subscribe or become a follower, so you can keep up with all my bloggy goodness.

    Happy birthday to my better half! 


     To celebrate the occasion of his birth, 29 years ago, I'm spending the latter part of my morning baking a cherry cheesecake. It is in the oven right now and, let me tell you, the batter alone tastes soooooo good.  I used this recipe, Aunt Connie's Amazing New York Style Cheesecake.  According to the author, it is fool-proof.  Given that this is my first cheesecake ever, I'm banking on it.

    Tuesday, February 15, 2011

    nearly dye-free strawberry cake balls

    If you enjoy what you find here, be sure to subscribe or become a follower, so you can keep up with all my bloggy goodness.

    Like most elementary students, Alex had a Valentine's Day party at school yesterday. When the goodies and treats sign up sheet came out last week, I wrote in that I would send cake balls, much to my family's delight.


    In developing this recipe, my goal was to provide a treat that was on the healthier side of the scale, as well as something that was tasty and not nearly nutritious. In my recent reading, I have been learning that kids with ADHD may have sensitivities to certain food additives and colorings, so I sought to eliminate the majority of the food coloring from my preparations. Yet, I wanted to do so in a way in which the result would be tasty, pretty, and fun. I must disclose that, at the end, I topped each cake ball with a smattering of red sprinkles, because I just couldn't help myself, but you could easily leave these out for a truly dye-free treat.


    Ingredients:
    1 French Vanilla Cake Mix, or ingredients for any white cake recipe of your choosing. I had very little time, so I went the way of the mixes.
    2ish cups of strawberry puree (see below)
    Vanilla Almond Bark
    1 TBS Shortening
    Sprinkles, if desired

    Strawberry Puree
     Last May, we went out to a local berry farm to pick strawberries.  I bought way more than I needed so that I could freeze the excess and have strawberry treats all year long.   Before freezing, I washed, capped, and sliced the berries.  Then, I froze them in 3 cup increments.  If, like most, you didn't do this, then just pick up a couple of containers of strawberries from your grocer.  Or, substitute frozen berries.  If you go for frozen, check the label for dyes, though.

    Thaw your berries, if needed, in a saucepan over low heat.  When berries can be easily separated, put them in a blender or food processor and blend until smooth.  Set aside.

    Preparation:
    Prepare cake mix as directed, but substitute strawberry puree for oil, as you would applesauce in any other recipe.  This will give the cake a delightfully berry flavor.  Bake in any cake pan as directed.  Let cool.

    When cake is cool, slice cake into inch-size chunks and place in a large bowl.  Using a potato masher, mash.  Add strawberry puree in small increments until cake is wet enough to stick together in a ball, but not too gooey.  Put mixture in the freezer and let chill for an hour or so.

    Ballin' it Up:
    Remove mixture from freezer and, using a favorite spoon or cookie scoop, scoop cake mix into balls and place on plates or a cookie sheet that will fit in your freezer.  If desired, roll balls to make them more round or shape into any form desired.  Hearts would be cute.  Freeze balls for another hour or so.

    Alternative: Use buttercream frosting with strawberry flavoring instead of the strawberry puree to get a richer, more decadent treat.

    Dippin':
    Heat Almond Bark and shortening in a microwave-safe bowl for 90 seconds.  Stir.  Continue heating at 15 second intervals until melted and shortening is combined.  Using two forks for search and rescue, drop cake balls into almond bark and cover.  Retrieve and place on Parchment Paper-covered plates or sheets.  Sprinkle with candy immediately, if desired.  Repeat for all of your balls.

    Serve whenever.  But, don't be surprised if these two-bite goodies don't last very long. 


    For those of you following my mortified mama series, don't be surprised when I gain, oh... ten pounds this week.


    For better directions, much better photos, and fantastic ideas, check out Bakerella's lovely site.

    A special thank you to Nicole for teaching me how to make these yummy desserts.  My family loves you.  If you're in the Roanoke area, Nicole makes the BEST cakes and cake pops around.  Check out her One Bite Delights to place orders for cake balls or cake pops for your next party or social function.

    Cake Balls are just the right size for toddler hands.

    Thursday, December 16, 2010

    short takes

    If you enjoy what you find here, be sure to subscribe or become a follower, so you can keep up with all my bloggy goodness.

    We're having a snow day today. Alex is out of school, the roads are covered with slippery snow, and we're stuck inside. Today will be a day to relax, make some Christmas crafts, and spend time as a family.

    Today, I'm baking a Cinnamon-Apple Cake using some bruised apples from the grocery store.  I don't know if I accidentally bought bruised apples, or if Katie bruised them while shuffling the bag around the house once I got it home.  At any rate, no one has wanted to eat these things and they are about to go to waste.  So, we're going to have a treat.

    I'm also planning on making some salt dough ornaments with the kids today.  We'll give these as Christmas presents to teachers and some family.  I can't wait to see how they turn out, as I've never made them before. 

    At some point, we'll likely go outside to play.  We're expecting 3-6 inches of snow today, according to the latest reports.  This afternoon, it will turn to sleet and freezing rain, so we'd better get out there while we can!

    Wednesday, December 8, 2010

    whitewashing the walls

    If you enjoy what you find here, be sure to subscribe or become a follower, so you can keep up with all my bloggy goodness.

    Yesterday morning, a gaggle of friends brought their kids to my house to decorate Christmas cookies. I love hosting play groups like this, where the moms can get together to drink coffee and laugh, and the kids have a little activity and then time to play. We had a blast. My friend, Catherine, names have been changed co-hosted with me and brought over tons of cookie cutters and Alton Brown's Sugar Cookie dough.  Several other ladies bundled up in this frigid weather and joined us for the fun.

    photo by dano, via a creative commons license
    This is the thing, though.  While I love to have people over for a good laugh, I don't enjoy having to clean up my house before they arrive.  I had an even harder time of it this go-round because my son's Cub Scout den (for which I am the leader) had a meeting the night before.  And, I had had errands to run and other stuff to do for much of the day.  And, after I got home, I spent some quality time with the mister instead of cleaning up all of our crap.  So, come sun-up Tuesday morning, my house was not in tip-top shape.  By far.

    I jumped out of bed and promptly started cleaning blogged.  It was a short post, but one that required a little research.  When I finished, it was 8:30 ish.  I jumped in the shower, because you can't be a stinky hostess with a messy house.  That's just not cool.  Catherine was due at my door at 10 AM.

    Upon finishing my shower, I finally began to pick up the mess.  Clean the table, counters, bathroom... check.  Pick up toys... check.  Remove random junk that has been strewn from one corner of the house to the other... semi-check.  All that stuff got piled on my bed to be dealt with later.  Vacuum..... vacuum.... vacuum... why isn't my vacuum working?  Crap and double crap!    Fling the vacuum aside... check.

    Dishes.  Oh, the dishes.  Needless to say, I hadn't worried over the dishes the night before because I was too, um... busy.  The sink was piled high.  The time is ticking down.  The dishwasher was already full of clean dishes that would have to be unloaded.  What to do?

    courtesy of miss pupik, via a creative commons license
    What to do?  Suddenly, the name of a favorite blog came to mind, Just Hide the Dishes in the Dryer.  Grabbing up my large turkey roaster, I starting piling dirty dishes inside.  One, two, three pots and pans.  Numerous plates, coffee mugs (Yes, Liz, that's why you had to use hubby's John Wayne mug.  My nicer ones were hidden), silverware, serving spoons, all the random junk we use in our day to day lives.  Out of my sink, into the roaster.  Four, five, six... where do I put this shit?  Lifting the roaster (wow, this is heavy), I dashed down the hall and into my bedroom.  The dishes were plopped on the floor by my bed, roaster and all.  I would deal with them later.  Back out to the kitchen I go to semi-shine my sink.  They'll never know!

    That is, until I write a post about it.  But, I do have a point.  Yesterday, my home looked presentable.  Obviously lived-in, but (fairly) clean.  My vacuum did break, remember?  Hopefully, my home exuded comfort and welcome and a sense of this-is-me-not-trying-too-hard.  Out of respect for my friends, I cleaned up my home so they would feel comfortable.  So they wouldn't have to look at all of my grime.  I think that's perfectly acceptable, even hospitable to do.

    But, what about ourselves?  Do we clean up our personalities when we're with our friends?  Or, do we let it all hang out?  Do we really show them our true selves?  Are there corners that we try to hide away from prying eyes?  If so, why?  Why must we fake a perfect persona for the world to see?  Why must we always be the peppy, perfect cheerleader?  Why must we always be dressed to the nines?  Can't we wear our sweats once in awhile?

    Let down your hair, ladies.  Allow your friends to really get to know you.  Seek out a few close relationships, if you haven't already.  Sometimes, it's okay to have proverbial dishes in the sink.

    Tuesday, November 23, 2010

    southern-style green beans

    If you enjoy what you find here, be sure to subscribe or become a follower, so you can keep up with all my bloggy goodness.

    Nothing says Thanksgiving like a big ol' bowl of green beans. You can keep your green bean casserole, ladies. Don't let any creamed soup or fried onions touch my beans. I serve up Southern-style slow cooked green beans in my house and that's the way it is. My granny did it and my mother does it, and so do I. This flavorful crockpot full of goodness is a tradition in my family and no feasting holiday (Thanksgiving, Christmas, Easter, the random birthday...) would be complete without it.

    not my beans, but close enough
    Southern-style green beans
    4 cans of cut green beans
    3 cans of shelly beans
    1/4 package of fat back, side meat, or streaked meat
    water
    salt and pepper to taste

    Combine beans in a large crockpot.  Cut meat into chunks and throw it in.  You'll want to cut your meat in larger chunks if you plan on fishing it out (my mother-in-law doesn't like beans cooked with pork, but what she doesn't know won't hurt her, so I always remove the meat before serving to her.  Do it however you want).  Stir and cover with water.  Add salt and pepper with taste, you probably won't need much salt.  Cook on low 24-30 hours or high 12-18.  I prefer to put mine in the afternoon before the meal and let them cook all night and most of the next day.  The longer you cook them, the better they taste and your home will smell SO good.

    A note on shelly beans: These are really hard to find in some grocery stores.  Essentially, they are green beans with some brown beans mixed in.  So, if you are unable to purchase shelly beans, just buy pintos and rinse off the juice.  1 can of pintos would be equal to 3 cans of shelly beans, but you'll also need to add another can or two of green beans.  Lucky for you, this isn't rocket science, so combine them any way you please.

    Monday, November 15, 2010

    No-Knead Garlic Cheese Bread

    If you enjoy what you find here, be sure to subscribe or become a follower, so you can keep up with all my bloggy goodness.

    Over the weekend, I went to a potluck bonfire. It was such fun! The host made a great big pot of chili and asked everyone to bring a side. Well, what goes better with chili than a big ol' loaf of homemade bread?

    source
    I had made this 4 Hour No-Knead Bread a few times over the summer and had some success with it.  So, I pulled up the recipe once more and gave it a whirl.  I doubled it up because of the size of the crowd (an expected 30-40 guests) and I added some jazz in the form of grated cheddar and Parmesan cheese, garlic, and onion salt.  The bread was a huge hit!

    No-Knead Garlic Cheese Bread
    3 cups of bread flour
    1 tbsp salt
    1 packet yeast
    1.5 cups warm water (more or less, depending on weather)
    1 cup cheddar cheese
    1/2 cup fresh grated Parmesan cheese
    Garlic powder to taste, I used about 3 tbsp
    Onion powder to taste, I used about 1 tbsp
    2 tbsp olive oil
    1 egg

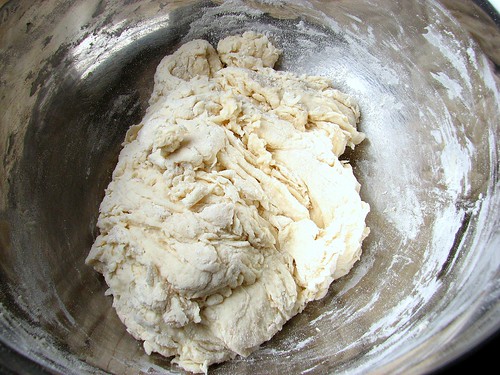
    Mix together flour, salt, yeast, cheese, and seasonings in a large bowl.  Gradually stir in water until dough is shaggy, but water is well-incorporated.
    source
    Set aside, cover with a damp tea towel and let rise for a minimum of four hours.  The longer you let the bread rise this go-round, the better it will taste.  Then, turn your bread out on a clean counter, punch it down once, flop it together in a loaf-like shape, and place into your pre-oiled baking dish (use the 2 tbsp of olive oil for this).  I like to use a pyrex square baker for more-rounded loaves, or a 13x9 inch pan for longer loaves.  Let rise again for one hour.  Slice the top of the bread and brush on some beaten egg.  Bake at 450 for 30-45 minutes.

    Thursday, October 21, 2010

    Boo-tastic Brownie Cake

    If you enjoy what you find here, be sure to subscribe or become a follower, so you can keep up with all my bloggy goodness.

    I'm headed over to a friend's tonight for dinner and Cub Scout day camp planning. She's grilling up some burgers and I'm taking dessert. When I sent my husband to the store yesterday, I wasn't sure what I wanted to bake, so I had him pick up some brownie mix for simplicity's sake. You know, you just can't go wrong with brownies!

    I dreamed up this little cake while torting and filling Katie's birthday cake this morning.  It is comprised of three 6" brownie rounds and a simple, yummy filling.


    To make this brownie cake, you'll need:
    • 6" round cake pan 
    • shortening to grease the pan
    • 1 box of your favorite brownie mix (mine even has walnuts!)
    • ingredients to make cake-like brownies (typically water, oil, and a couple of eggs)
    • 1 cup of cool-whip
    • 1 package of cream cheese
    • 1/4 cup powdered sugar
    • 1/4 cup of white chocolate chips or an equal amount of candy melts
    • 1 spoonful of chocolate icing
    • wax paper
    • ghost cookie cutter

    Begin by preheating the oven according to the brownie directions.  Grease your pan with shortening.  Don't forget the sides and that pesky area where the side meets the bottom.  Mix up brownies as directed.  Either divide equally into three different 6" cake pans or just eyeball it and put a third of the mixture in the one pan, bake and repeat for all three layers.  Bake for approximately 15 minutes, but watch it carefully!

    When done, turn out on a cooling rack and let cool.  I found that it did best if I popped it out of the pan and then flipped the brownie layer back over to cool right side up.  That way, all the little brownie flakes don't stick to the rack.  While all three layers are cooling, make your ghost and your icing.


    Ghost Directions:
    Melt your white chocolate or candy melts in the microwave or in a double boiler, stirring until smooth.  Put a piece of wax paper on the counter.  When chocolate is melted, use a spatula to spread the chocolate in a thin, even layer across the wax paper.  Let sit until it is no longer tacky to the touch, but not dried hard, either.  Use your cookie cutter to cut out the ghost shape.  Lift with spatula and place atop one of the brownie layers.  Then, put your spoonful of icing into a plastic baggie, snip a small bit off the corner, and pipe on your ghost's eyes and mouth.  At this time, you can also pipe around the outside of the ghost to cover any rough edges.  Don't do any other decorations at this point!  They will only get messed up when you stack the layers.

    Icing/ Filling/ whatever you want to call it.
    Combine cream cheese and powdered sugar in a bowl.  Fold in cool whip. If you're like me and forget to measure the cool whip and only dump in the whole container, add more sugar until icing becomes thick.  But, that's only if you're like me, 'cause I like it stiff.

    Putting it all together:
    Layer your brownie cake as you would any other cake.  Trim the layers, if necessary.  Place your bottom layer on a plate or cake board and plop your filling/icing on top.  Use enough so that it will smoosh out the sides when you put the next layer on top.  Also, make sure it is semi-even so it drips neatly, if a drip can be neat.  Add the next layer and repeat.  Finish with the top layer, which should have your ghost transfer.  Add additional piping and decorations as desired.


    If you want additional tips on how to do chocolate transfers, see this handy-dandy photo tutorial.

    This recipe was adapted from Pampered Chef's Tuxedo Brownie Cups.  I love that recipe, but I can never eat just one, and the icing is so delicious!  So, I devised a way to get a bigger portion with more of the good stuff.  Who can blame me?

    halloween fare: tapeworms and cockroaches

    If you enjoy what you find here, be sure to subscribe or become a follower, so you can keep up with all my bloggy goodness.

    Just in time for Halloween, my friends and I had our monthly recipe swap.  The premise is that each person will bring a dish and share a recipe according to the month's theme.  This was our third get-together and it was a fun one.  Mrs. M came up with the theme for October and served as our lovely host.  Her idea?  Halloween look-alike foods.  Oh, goody!

    A quick google search turned up loads of spooky and gross recipes.  After much thought, I finally settled on two: Barbecued Tapeworms and Stuffed Cockroaches

    Barbecued Tapeworms
    Though the original recipe for the tapeworms called for hot dogs, I used a pack of smoked sausages that I had in the freezer to make the tapeworms.  I also substituted barbecue sauce in lieu of the ketchup.  This gave the dish a flavor similar to that of cocktail wienies.  Simply slice each sausage lengthwise into 6-8 pieces.  Boil and drain.  Return to pot and combine with 1/4 cup of your favorite barbecue sauce.  Simmer 20-30 minutes, stirring occasionally.  Serve warm.  While the recipe I referenced said to serve them as sandwiches on hot dog buns, I chose to just set my worms out in a bowl.  Either way is fine.

    Stuffed Cockroaches
    For the cockroach dish, I used pitted dates, a block of cream cheese, and 1/4 cup of crushed walnuts.  Simply leave the cream cheese out until it is good and soft (I skipped this part, trust me-- you want to be patient).  Then, combine walnuts and cream cheese.  Go ahead and add some food coloring to turn the mixture brown, or even puke green, if you want to be really gross.  Slice the dates open down one side, smoosh some filling inside, and pinch closed.  Serve on a creepy dish with plastic roach garnishes, if desired.


    Did you know...
    • Cockroaches have been around since the time of dinosaurs!
    • A cockroach can live almost a month without food.
    • A cockroach can live about two weeks without water.
    • Some female cockroaches only mate once and stay pregnant for life!
    • A cockroach can live for up to one week without its head!
    • Cockroaches can hold their breath for up to 40 minutes!
    • Cockroaches can run up to 3 miles an hour.
    source: Pest World for Kids

    Saturday, October 16, 2010

    cheesy potato soup

    If you enjoy what you find here, be sure to subscribe or become a follower, so you can keep up with all my bloggy goodness.

    The weather is turning nippy, leaves are changing colors, boy scouts are selling popcorn (ahem), Halloween costumes are being made, and the wind is blowing strong.  It's time to whip up some soup!


    For this recipe, you'll need:

    • A bunch of potatoes.  I think I used about 8 medium russets
    • Two cans of stock, whatever type you have.  Use homemade if you want.
    • A couple of cups of water
    • Cheese.  I prefer cheddar.   I used a LOT for this, use as much as you're willing.  At least two cups, I'd say.
    • Milk or cream.  About a cup, maybe two depending on how creamy you like your soup and which dairy option you choose.
    • Corn starch, two to four tablespoons.  Again, this depends on how thick you like your soup.
    • A dash or three of Worcestershire sauce for tanginess.
    • Green onions to make it pretty

    Lookie here.  I thought this was the most ingenious move of the year.  I used my apple peeler/corer/slicer to peel and slice my potatoes!  Who would've thunk of that?  I just stuck that bad boy in there, gave it a twirl, and had handy-dandy potato curls.  Viola! 


    See how easy it can be?


    And, then, you get these cute little potato rings.  They boil up really quickly, too.  This is how I've started doing my mashed potatoes, as well as the taters for this soup.

    Then, pour your water and broth in a pot and boil 'em up just like so.  You don't need that stick of butter in the background.  That was for something else. When your potatoes are all nice and soft, take a trusty potato masher and smoosh them all up.  Whatever you do, don't drain them! 
    Then, add your cheese.  If you buy it in a block, like I do, grate it up and toss it in.  I did about a cup at a time.  Stir it up so that the cheese gets all nice and melty.  If you use extra sharp cheddar, you'll probably wind up using less than two cups.  Or, you could do a combination of a few of your favorite cheeses.  Once you've got all your cheese melted, add your milk.  Just drizzle it in while stirring.  Mix it all up and then add your corn starch.  Make sure to follow the directions on the back of the corn starch container, or else it will be all lumpy.  Add salt and pepper as desired.  Simmer the soup for awhile, however long you happen to have.  Then, either use an immersion blender to smooth everything out or put a few cups of soup in your blender at a time.  Just, cover the hole in the top of the blender, so that you don't splatter everywhere!  Pour the soup back into the pot and repeat.  When you're done, it should be nice and thick and smooth.

    Then, add your Worcestershire sauce.  If you add it at the end, it gives the soup the kick it needs.  Serve in bowls, garnished with green olives.  We ate ours with yummy grilled ham and cheese sandwiches, topped with caramelized onions and spicy mustard.  (Thanks to Arisce for that recipe.)


    Saturday, August 28, 2010

    chocolate peanut butter birthday cake

    If you enjoy what you find here, be sure to subscribe or become a follower, so you can keep up with all my bloggy goodness.

    For a bit of fun, I tweeted while baking my birthday cake yesterday.  Lots of people have asked why I baked my own cake and the answer is simple.  I found this recipe, fell in love with the idea of it, had to have it, and set my mind to baking it.   Halfway through (or thereabouts) I realized I had forgotten to buy cream cheese at the store, a necessary ingredient for the smitten kitchen icing.  So, I hopped over to all recipes for a variation of the peanut butter icing.  I think it is delicious, just like a peanut butter cup.  But, if you decide to make it, double the icing recipe.  I ran out and wasn't able to properly ice the sides of the cake.  Anyway, feeling inspired, I cut up some Reese's Cups that I bought for just that purpose happened to have laying around, chopped them up, and sprinkled them across the top.


    And, by the way, look for a giveaway from Heaven Baked Sweets coming soon.  She's working on a new cookie mix, but you didn't hear it from me....

    Tuesday, August 17, 2010

    Belgian Breakfast


    There's nothing better than Belgian waffles for breakfast.  Awhile back, I came across the following recipe on about.com and it quickly became my favorite.  The recipe is courtesy of a pair of innkeepers, Betsy and Karol Patterman, from Ashland, New Hampshire.  I typically double this recipe and freeze the leftovers for weekday breakfasts.


    Belgian Waffles
    Prep Time: 20 minutes
    Cook Time: 20 minutes
    Total Time: 40 minutes
    Ingredients:
    • 2 cups all-purpose flour
    • 2 teaspoons baking powder
    • 2 tablespoons confectioners sugar
    • 1 tablespoon vegetable oil
    • 2 cups milk
    • 3 eggs, separated
    • 2 teaspoons vanilla
    • pinch of salt
    • fruit of your choice
    • whipped cream
    Preparation:
    Combine the flour, baking powder, confectioners sugar, oil, milk and egg yolks. Beat the egg whites until they stand in soft peaks and fold into the batter (do not overmix).
    Using a 4-ounce ladle, pour 1/8 of the mixture into a hot waffle iron and bake for about 2 minutes.
    Repeat with the remaining batter.
    Top with the fruit and whipped cream and serve hot.
    Yield: 8 waffles.


    Related Posts with Thumbnails